Tormach CNC Mill Safety and Basic Use
COURSE # CNC301
Version 1.4
Tormach CNC Mill Safety and Basic Use
Course Synopsis
In this Safety and Basic Use class (SBU), you will learn to fabricate objects, parts, and/or art with the CNC Tormach PCNC 1100. This is a powerful tool that can produce complex organic shapes and surfaces in ferrous and non-ferrous metals. You will learn how to operate the CNC Tormach safely and efficiently. We will discuss Stock Setup methods and how your CAD files can become CAM programs.
Time Required: 3 hours
Tools Required
□ Safety glasses
□ Ear protection
□ Endmills with 1/8”, 1/4” shank (provided)
□ Calipers and tape measure (provided)
□ Collet wrenches (provided)
Materials Required
□ 2” x 3” x .25” aluminum
Copyright 2005-2013 TechShop, Inc. All Rights Reserved. Version 1.4 Page 2 of 10
Tormach CNC Mill Safety and Basic Use
TechShop Safety Policy
• Closed toe shoes must be worn at all times in TechShop
• Do not use tools or equipment while tired, distracted or under the influence of drugs or alcohol
• If a tool is damaged or missing parts, notify TechShop staff immediately • Never leave a machine running unattended
• Do not force equipment or tools; ask a TechShop staff member for assistance if you encounter any difficulties in operation
• Ensure equipment is safely OFF before walking away
TechShop Workspace Etiquette
• If TechShop equipment breaks or gets damaged while you are using it, inform the TechShop staff. Equipment damage is a normal part of the shop environment – for safety reasons it is important to inform a TechShop staff member immediately
• Do not attempt to engage other members while they are using tools or equipment
• If you are ever uncertain about using a piece of equipment, ask a TechShop staff member for assistance
• Keep your work area clean and free of obstacles
• Put away your tools and equipment after use so other members may use them • Leave your work area clean when you finish so other members may use it
Tormach CNC Mill Safety and Procedures
• Rotating parts of the machine can grab loose objects and pull them into the machine. Be sure to wear short sleeves, tie back long hair and remove all jewelry (including rings and watches) and gloves
• Never leave the machine unattended while it is running, even if the program may take hours to complete
• When in doubt, take small cuts at slow speeds. Cutting too fast or deep may break the cutting tool or dislodge the part from the vice and send it across the shop
• Since the machine is shared among many different users, be sure everything is configured to your preferences before starting a project
• Be prepared to STOP the machine at any time using the E-Stop button, especially when starting an untested program
• Switch OFF the spindle, or place the spindle control in a safe state when changing spindle tooling, especially if part of your body is within the machine working area
• Chips from the machining process can be very hot and sharp, so take care when clearing them away from the part and during cleanup
Copyright 2005-2013 TechShop, Inc. All Rights Reserved. Version 1.4 Page 3 of 10
Tormach CNC Mill Safety and Basic Use
Overview
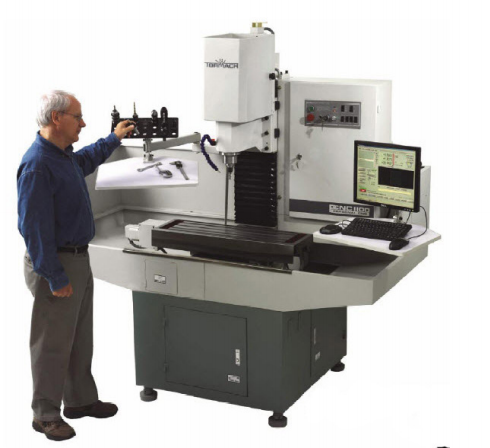
The Tormach PCNC 1100 CNC mill is straight forward and easy to use. It can cut a diverse range of materials from metals such as aluminum and steel to plastics such as ABS, PVC and Delrin.
The Tormach table size is 34” x 9.5”, has three 5/8” slots for holding vices or other clamps, and can travel 18” in the X direction, 9.5” in Y, and 16.25” in Z, with a maximum feed rate of 65 inches per minute (IPM). The spindle drive provides manual or automatic speed control of 100 to 2,000 RPM using the low ratio, and 200 to 5,140 RPM using the high ratio.
A mill is used to machine surfaces, cut slots and pockets, and drill holes to precise dimensions. In the case of the Tormach mill, the spindle holds the tool and moves in the Z axis, while a clamp on the table holds your work and moves the X and Y axes.
A CNC mill is controlled by a program created by CAM software such as VCarve Pro, Cut3D or InventorCAM.
 Copyright 2005-2013 TechShop, Inc. All Rights Reserved. Version 1.4 Page 4 of 10
Tormach CNC Mill Safety and Basic Use
Equipment Controls
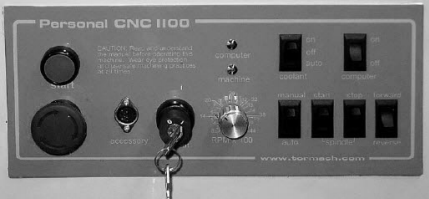
Start: The Start button turns on the circuits for the axis drives and the spindle motor.
E-Stop: The Emergency Stop button stops all motion and is locked when pressed. To release, turn the button head a quarter-turn clockwise.
Spindle Lockout Key
Start Computer On/OffSpeed Dial Coolant On/Off/Auto
E-Stop
Spindle Auto/Manual
Spindle Start and Stop Spindle Direction
Spindle Lockout Key: Power to the spindle motor can be disabled using the Spindle Key switch, while still allowing the Z axis to move.
Speed Dial: Controls the speed of the spindle when the spindle is under manual control.
Coolant On/Off/Auto: Setting this switch to Auto gives control of the coolant over to the computer, Off turns the coolant OFF altogether, and On turns the coolant on.
Computer On/Off: This is a rocker switch that controls the power to the two outlets for the computer and monitor.
Spindle Auto/Manual: In the Auto position, the computer controls the spindle speed, while in the Manual position, the user controls the spindle speed.
Spindle Start and Stop: These switches allow you to start and stop the spindle when the spindle is under manual control.
Spindle Direction: This sets the rotation direction of the spindle. Forward spins the spindle clockwise, while Reverse spins it counterclockwise.
Copyright 2005-2013 TechShop, Inc. All Rights Reserved. Version 1.4 Page 5 of 10
Tormach CNC Mill Safety and Basic Use
Startup
1. When the machine is fully turned OFF, push the E-stop on the front of the cabinet and set the Computer switch to OFF. It’s important that the drive motors don’t come alive before the brain is up and functional.
2. Turn the large red and yellow rotating power switch on the side of the cabinet to the On position (clockwise). This doesn’t actually turn anything on; it’s more like switching on the power strip that everything else is plugged into.
3. The computer needs to boot up before activating the drive motors. On the front of the cabinet, set the Computer switch to On to turn on the computer.
4. When the computer has booted up, double-click the Mach3 icon to launch Mach3, the program that runs the Tormach.
5. Copy your part program to the Tormach hard drive to avoid any errors that may occur in the USB interface.
6. Load your G-code program into Mach3.
7. Release the E-stop on the cabinet by turning it clockwise and press the green Start button to power up the motors.
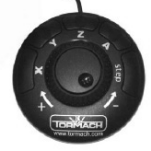
Jog Wheel
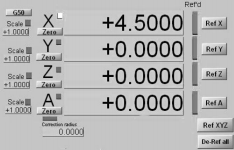
The jog wheel buttons select which axis to move, while the rotating the wheel in the middle will move the axis on the machine. A yellow square in the Digital Readout portion of the computer screen indicates which axis is selected for jogging. You can also move the axis using the arrow keys (X and Y) and page up/down keys (Z) on the keyboard.
Use the Step button on the jog wheel to cycle through the standard jog lengths or use the keyboard to enter a jog step value. There are two wheels to turn in the center of the jog wheel. The outer wheel springs back to center and will jog the selected axis faster, the further from center it is turned. The inner wheel is operated with your fingertip and has detents that will jog the selected axis the specified jog length for each click.
Jogging the machine the direction you intend takes some practice, so be careful around any parts, stock or fixtures.
The yellow square next to the X indicates Jog Wheel
the X axis is selected for jogging.
Copyright 2005-2013 TechShop, Inc. All Rights Reserved. Version 1.4 Page 6 of 10
Tormach CNC Mill Safety and Basic Use
Tooling
The Tormach mill uses a standard R8 spindle and collet that do not fit any other machines in TechShop. The Tormach Tooling System allows you to set up a series of tools in different holders that can be easily changed as needed. The holders and other Tormach tools can be checked out from the front desk.
1. Check the coolant level in the machine and alert a
TechShop DC if it’s low.
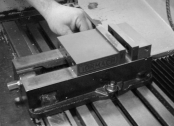
2. Mount your work piece securely in the machine.
A vice is a common work holding method, while
fixtures or the work itself may clamped to the bed
of the machine using step blocks, clamps and
T-nuts.
3. Locate the X and Y axis zeros for your part. 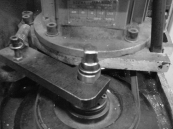
Depending on the accuracy desired, this can be
done by eye or by using an edge finder. If using an
edge finder, follow these steps:
a. Open the front door of the spindle and
move the spindle lock arm to the right to
hold the draw bar tight.
b. Use a 3/4” wrench to loosen the draw bar nut, insert 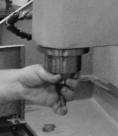
the edge finder into the end of the spindle, and tighten
the drawbar nut. Keep a hold of the tool to make sure
it doesn’t fall out of the machine.
c. Move the spindle lock arm back to the left and close
the door.
d. Set the spindle speed to 1,000 RPM, set spindle
control to Manual, and start the spindle.
Copyright 2005-2013 TechShop, Inc. All Rights Reserved. Version 1.4 Page 7 of 10
Tormach CNC Mill Safety and Basic Use
e. Jog the machine so that the tip of the edge finder is outside and below the top of your work. Move the edge finder towards your work, slowly. Use a .001” step and the inner wheel on the jog wheel for precise control. When the two parts of the edge finder come together, it means you’re close to the edge of your part. When the two halves pop apart, that means you’re at the edge of your material.
f. Set the zero for the axis you’re locating by clicking the Zero button in the Digital Readout.
g. Repeat for the other axis.
h. Move the edge finder above the top of your work, enter G0 X0 Y0 in the MDI (manual data input) field, and press Enter. Adjust the values to read half the diameter of the edge finder by double-clicking in the X and Y fields and manually entering a number. Remember to use negative numbers, where appropriate.
i. Recheck your zeros by entering G0 X0 Y0 in the MDI field.
4. Locate the top of your part.
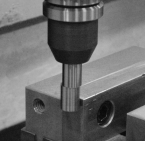
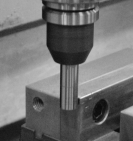
a. Following the same procedure as the edge finder, above, insert the cutting tool you’ll be using into the collet. When removing tools from the collet, keep your hand under the tool to catch it and avoid damaging it.
b. Once the tool is inserted, jog the tool down to the top of the part. A common way to set the zero to the top of your part is to insert a piece of paper between the tool and the part. Use a .001” step and the inner wheel on the jog wheel for precise control. When the paper does not slide under the tool, the tip of the tool is about .002” above the part.
c. Zero the Z axis by clicking the Zero button in the DRO, then remove the paper, double-click in the Z field, and enter .002”.
5. Place the shield on the front of the machine to protect yourself from coolant, chips or other things that may fly out of the machine.
6. If you’re using a manually-controlled spindle speed, use the speed dial to set the correct spindle speed, flip the spindle auto/manual switch to Manual, and use the spindle Start switch to start the spindle.
Copyright 2005-2013 TechShop, Inc. All Rights Reserved. Version 1.4 Page 8 of 10
Tormach CNC Mill Safety and Basic Use
7. Place one hand over the E-Stop button, then click the Cycle Start button on the computer screen twice to start the program. Use the space bar to pause your program, if necessary. The space bar pauses the program but does not stop the spindle. Do not hesitate to push the E-Stop button if things aren’t going along as planned. It’s much easier to restart a program than explain how you broke the machine.
8. Once you’re confident that the machine is set up properly and will not crash into anything like a vice or the table, you can remove your hand from the E-Stop button.
9. Turn the coolant on by setting the coolant button to On or periodically spray your work with coolant to keep the tool and workpiece cool and lubed for a quality finish and longer tool life.
10. Make sure you never leave the machine unattended while it is running.
Shutdown
1. To shut down the Tormach, deactivate the motors by pushing the E-Stop button on the front of the cabinet.
2. Exit Mach3, delete any files you copied onto the computer, then shut down Windows through the Start menu. Remove any flash drives you used to transfer files.
3. When the computer has shut down, turn the computer power switch on the Tormach to the OFF position.
4. Turn off the power to the whole Tormach by turning the red and yellow power switch on the side of the cabinet to the OFF position (counter-clockwise).
Cleanup
• Use a vacuum to remove the chips created during machining and wipe up any excess coolant with a rag
• Remove and store the vice or hold-downs you used
• Sweep the floor around the machine and wipe any spilled coolant
• Remove any cutting tools from the machine and return the Tormach tooling box to the front desk
Copyright 2005-2013 TechShop, Inc. All Rights Reserved. Version 1.4 Page 9 of 10
Tormach CNC Mill Safety and Basic Use
Resources
http://www.tormach.com/documents.htm
The Tormach document library with user manuals and other helpful materials.
http://www.cncci.com
CNC Concepts has lots of good training materials for beginner and advanced users.
http://www.mmsonline.com
Modern Machine Shop Online has lots of news about the machining industry.
What’s Next?
After successfully completing this Tormach CNC Mill class, you may be interested in these classes:
CNC201 CAD/CAM Software - VCarve Pro and Cut3D
CNC403 Tormach II - 4th Axis and Tool Changes
AUD006 Autodesk Inventor - Basics
CNC310 CAD/CAM Software - InventorCAM
NOTE: Not all classes are available at all locations. Check online (www.techshop.com) or visit your local TechShop for a complete list of class offerings near you.
The Fine Print
Copyright © 2005 – 2013 TechShop, Inc. All rights reserved.
This manual is furnished under license and may be used or copied only in accordance with the terms of such license. The content of this manual is furnished for informational use only, is subject to change without notice, and should not be construed as a commitment by TechShop, Inc. Except as permitted by such license, no part of this publication may be reproduced, stored in a retrieval system, or transmitted in any form or by any means, electronic, mechanical, recording, or otherwise, without the prior written permission of TechShop, Inc.
TechShop and the TechShop logo are either registered trademarks or trademarks of TechShop, Inc., in the United States and/or other countries. All other registered trademarks or trademarks are the property of the respective owners.
These materials were written by Lynne Angeloro and Matthew Borgatti, and revised and updated by Micah McElravy. Class materials are the copyrighted property of TechShop and are intended for use in an instructional setting. Successful completion of SBUs is required for many of the products at TechShop. An instructor must sign OFF on this requirement; it is not enough to just read and follow these materials.
Copyright 2005-2013 TechShop, Inc. All Rights Reserved. Version 1.4 Page 10 of 10

