Table of Contents
Belt and Disc Sander
Write Tool Introduction Here.
The Tool Safety, Tool Care, Operation, section of this guide are what instructors use to ensure that you can use the equipment according to community expectations.
The Setup, Operation, and Cleanup Checklists of this guide are what instructors use to ensure that you can use the equipment according to community expectations.
The belt sander is great for knocking the corners and edges off of projects, and other convex contour shaping. The disc sander, while not as aggressive as the belt sander, is able to reach into interior corners and provides a more precisely flat surface.
Usage Highlights
Belt and Disc Sander Clearance or Class Equivalent Required Before Use.
| Safety | Care | Cleanup |
| —————————————————- | ———————————————————————————————————— | ——————————————— |
| 1. Keep materials flat to the table | 1. Use the entire width of the abrasive belt | 1. Brush the dust from the machine surfaces |
| 2. Do not angle materials upward into the abrasive | 2. Regularly clean out the sawdust from the abrasive using the eraser | 2. Sweep the floor surrounding the machine |
| 3. Do not use the other table as a storage surface | 3. Make sure the abrasive belt is tracking in the middle of it’s wheels | |
| 4. Submit a maintenance request when needed. |
Personal Protective Equipment
Safety glasses must always be worn. Hearing protection is highly recommended in the workshop, especially when the dust collection fan is active.
Tool Anatomy
For more visit the manufacturers website and user manual both linked at the top of this document.
Tool Safety
MACHINE ANATOMY
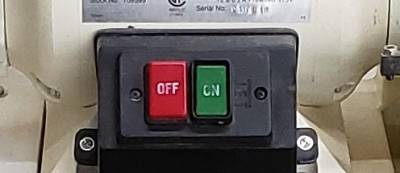
1. Power Switch - on/off switch
2. Maintenance Tag - Manually tracks the usability status with Green/Yellow/Red cards
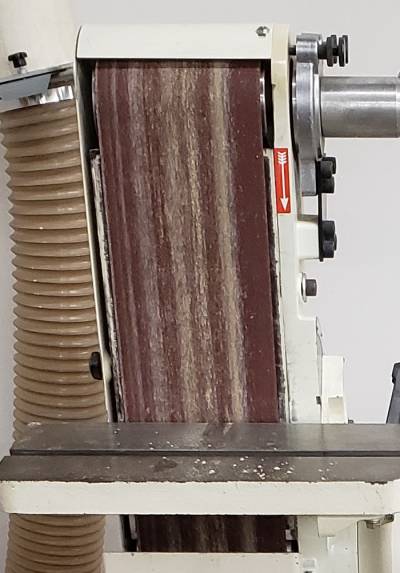
3. Belt Abrasive - Moves constantly downward past the table. These belts are 6” wide and 48” long. There is a graphite platen behind the belt to help support it horizontally without building up excessive heat from friction.
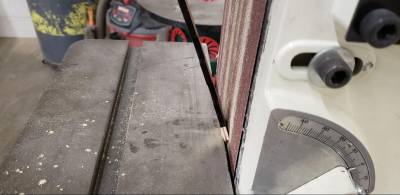
4. Belt Table - provides a stable platform on which to hold your work. Can be tilted between 90 and 135 degrees to the abrasive.
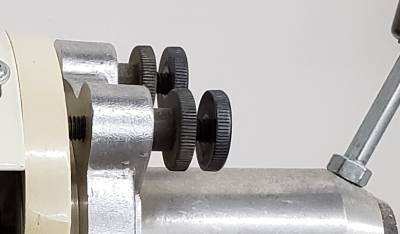
5. Belt tracking knobs - Used to center the belt’s tracking with regards to the drive wheels and platen. The lock knobs can be released, then the tracking screws adjusted slowly to move the belt left and right while the machine is powered on. Both screws should be touching the housing when properly adjusted. Lock the knobs back into place once they are situated properly.
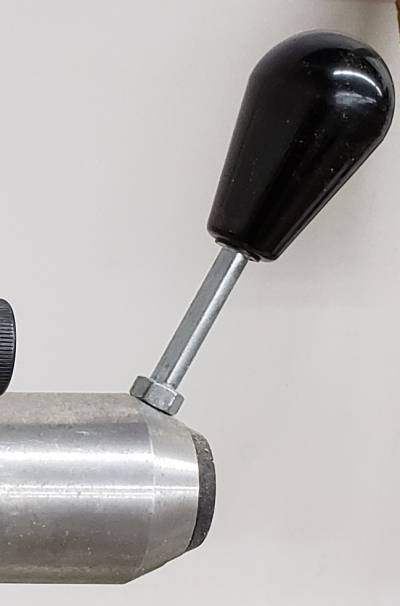
6. Belt tension release - The machine must be off and unplugged before using this lever. Pulling it towards you will release all tension on the belt, allowing it to be removed from the left side door of the housing.
7. Lower Guide Block - Just below the throat plate sit the lower blade guides, consisting of two Guide Blocks and one Thrust Bearing.
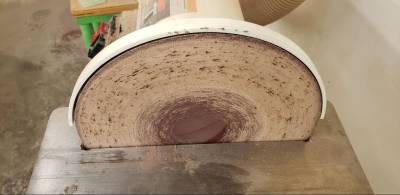
8. Disc Abrasive - Provides a very flat surface as a reference, and has an exposed edge that allows it to reach into the corners that the belt abrasive cannot. Rotates counterclockwise. 12” disc attached with pressure activated adhesive.
9. Disc Table - Provides a stable platform on which to hold your work when using the disc abrasive. Can be tilted between 90 and 135 degrees to the abrasive.
Tool Safety
COMMON HAZARDS
The abrasive belt and disc will be constantly trying to pull your workpiece downward into the gap between the abrasive and the table. If your workpiece is pulled into the gap, it may draw your fingers in with it, leading to debraiding and potentially amputation. Maintain a firm grip on the workpiece, and keep it held flat to the table to prevent it from being pulled in by the machine.
Thin, flexible materials may still get pulled down into the crack between the abrasive and the table even when held tightly, so use particular caution with those materials. If needed, use a thicker sacrificial piece below a thin workpiece to provide support.
If a workpiece is presented to the abrasive in an upward-facing angle, it can be forcibly pushed down and out away from the machine, posing an impaling hazard. Keep the workpiece flat against the table. Angled sanding can be done by flipping the workpiece on edge and presenting it at a 45 degree angle, or by angling the entire table.
PROHIBITED MATERIALS
Materials that are reclaimed may be painted with lead paint. Do not sand any materials that might possibly contain lead.
Metals are not permitted on the wood shop sanding equipment. Sparks generated pose a fire hazard due to the sawdust around the machine and in the dust collection system. Metals will also quickly wear out the abrasives and the graphite platen found behind the belt sander.
Initial Setup
SETUP CHECKLIST
1. Check for foreign objects
2. Verify that the belt tracking
3. Clean the abrasive surfaces
SETUP BREAKDOWN
Check for foreign objects
Before turning on the machine, verify that nothing has been left on the tables. It is easy to overlook something left on the table surface that you are not actively using. An object left on one of the tables can easily get jammed in the machine or be thrown across the shop.
Verify the belt tracking
Look at where the belt is sitting with regard to the top roller and the platen. It should be tracking centrally, and not touching any part of the frame of the machine.
Turn on the machine and verify that the tracking does not change when the belt is moving.
If the belt tracking is not centered, unlock the tracking adjustment knobs and SLOWLY make SMALL adjustments to the knobs. Allow the belt to settle into it’s new position before making more adjustments. Once the belt is running in the center of the rollers and platen, verify that both adjustment knobs are touching the housing. It is common for one knob to be in contact with the housing and the other to be floating a bit away from the housing. Once both knobs are touching the housing, lock the knobs securely.
Clean the abrasive surfaces
Look at the abrasives and see if they are clogged with sawdust. If sawdust is beginning to build up in the abrasive, touch the eraser lightly to the abrasive to pull out the sawdust and expose fresh grit.
Sawdust that has been overly compacted will form solid chunks that stick out from the surface of the abrasive and cause heat build-up due to friction between the sawdust and the workpiece. Once these have formed the abrasive usually needs to be replaced. If the abrasive is used after these build-ups have formed, they will scorch and turn black as they burn, and will leave a poor finish on the workpiece.
Submit a maintenance request if the abrasive needs to be replaced.
COMMON SETTINGS
N/A
CONSUMABLES
The shop is responsible for replacing the belt and disc abrasive.
Basic Operation
OPERATION CHECKLIST
1. Open dust gate
2. Power on Dust Collection
3. Place the workpiece on the table
4. Touch the workpiece to the abrasive
5. Clean the abrasive as needed
OPERATION BREAKDOWN
Open dust gate
Power on Dust Collection
Place the workpiece on the table
Set the piece flat on the table and make sure you have free range of motion to complete your task.
Touch the workpiece to the abrasive
If using the belt, use a gentle sweeping motion across the entire width of the abrasive while sanding. This will ensure that the belt will wear and stretch at the same rate, preventing premature tearing and buckling of the belt.
If using the disc, stay toward the front/left edge of the disc, where it is moving downward with relation to the table. Using the back/right edge of the disc will cause the workpiece to be lifted from the table. Avoid the middle of the disc, as it will tend to draw the piece toward the back of the disc, again causing it to lift from the table.
Clean the abrasive as needed
Keep an eye on the abrasive as you sand, and use the eraser to pull the sawdust out of the abrasive if it begins to get clogged.
Cleanup
CLEANUP CHECKLIST
1. Brush the dust off of the machine surfaces
2. Sweep the dust from around the machine
Maintenance Requests
If you encounter any of the issues listed in the Inspection area or have any other issues with the printer not working properly
- Update the physical Maintenance Tag at the machine
- 🟢Green can be used without issue
- 🟡Yellow can be used withcaution
- ⛔Red cannot be used without hazard to either the user or the equipment
- Record issues at https://protohaven.org/maintenance. This notifies our staff and volunteer maintenance crew of any issues.
Troubleshooting
| Common Issues | Possible Causes | Resolutions |
| ————————————————– | ——————— | ————————————————————————————– |
| The abrasive does not sand as fast as it should | Clogged abrasive | Use the eraser to unclog the abrasive Submit a maintenance request for new abrasive |
| Abrasive belt is rubbing against machine housing | Tracking is off | Adjust tracking, or submit a maintenance request if help is needed. |
Additional Resources
Staff Use
| ⚠️ AUTHORIZED MAINTENANCE GROUP ONLY |
If you are part of the maintenance group please log on to the #maintenance channel of our Discord server to:
- Perform a Maintenance Action
- Request a Maintenance Purchase
- Review complete Maintenance Logs for each machine
- Generally chit-chat about maintenance

