Table of Contents
Compound Miter Saw
Write Tool Introduction Here.
The Setup, Operation, Cleanup, Checklists of this guide are what instructors use to ensure that you can use the equipment according to community expectations.
Allows quick cuts when chopping lumber to length, as well as mitered cuts and beveled cuts. Can crosscut 4” thick lumber up to 12” wide.
Usage Highlights
Woodshop Drill Press Clearance or Class Equivalent Required Before Use
| SAFETY | CARE | CLEANUP |
| ——————————————————————————— | :———————————————————————————————–: | ———————————— |
| 1. Keep hands at least 10” away from path of blade | 1. Allow the saw to work at it’s own pace. Do not bog the motor. | 1. Brush chips off of the surfaces |
| 2. Clamp workpieces firmly to the table when too small to hold securely by hand | 2. When making beveled cuts, ensure that the fence extensions are out of the path of the blade. | 2. Sweep chips from the floor |
| 3. Use the table saw for any pieces that are too small to clamp | 3. Submit a maintenance request when needed. |
Personal Protective Equipment
Safety glasses must always be worn. Hearing protection is highly recommended in the workshop, especially when the dust collection fan is active.
Tool Anatomy
MACHINE ANATOMY
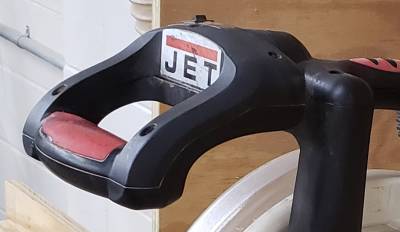
1. Power Switch - on/off switch is a trigger on the handle designed to be activated with the index finger of the right hand.
2. Maintenance Tag - Manually tracks the usability status with Green/Yellow/Red cards
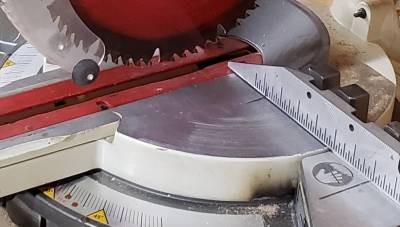
3. Table - Your workpiece should have one flat surface held firmly against the table
4. Fence - Your workpiece should have one flat surface held firmly against the fence
5. Miter detent release - Pulling this trigger releases a locking pin from detents found at commonly used miter positions. This trigger should be pulled any time you are moving the miter angle. Release the trigger when you are approaching your desired angle and allow the locking pin to drop into place in the appropriate detent.
6. Miter cam lock - If positioning the miter to an angle that does not correspond to one of the detent lock positions, push this cam lock lever down to lock the miter position. This is not a very firm lock, so do not use the saw roughly to avoid losing your angle.
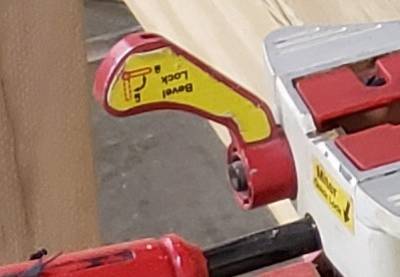
7. Bevel lock - Lift this locking lever to a vertical position to release the bevel lock. Be aware that the saw housing will flop heavily to the side if it is not supported at all times when the bevel lock is disengaged. Support the saw with your left hand, then release the bevel lock. Push the lever firmly downward to re-engage the bevel lock.
8. Bevel stop - If this knob is pushed in, the bevel angle will stop at 90 degrees. If this is pulled out, the bevel angle can be rotated to the right of 90 degrees.
9. Slide lock - This knob locks the sliding mechanism in place. When unlocked, the head must be pulled forward, chopped into the work, then pushed back to the fence. When locked, the head can be pulled down into the work like a normal, non-sliding miter saw.
Tool Safety
COMMON HAZARDS
Kickback
When a piece is not held firmly against the table or the fence, the blade can turn the workpiece inward towards the throat of the fence and cause kickback. Always make sure the work is firmly held to both the table and the fence, using the clamp when needed. If a workpiece is too small to use the clamp, use the table saw with a sled to make the cut.
A warped piece of wood can also kick back when it collapses mid-cut, pinching the blade. Make sure the wood is supported evenly along its length, and contacts the fence without any gaps.
Blade Contact Keep your hands clear of the cutting path.
PROHIBITED MATERIALS
Materials containing nails, screws, or lead paint should not be cut in the shop.
Initial Setup
SETUP CHECKLIST
1. Open the dust gate
2. Check the status of the slide lock
SETUP BREAKDOWN
Open the dust gate
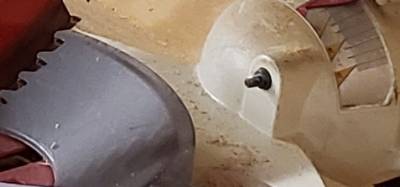
There is a dust port embedded in the table behind the saw. Opening the dust port to the left of the saw will help contain the amount of dust in the shop.
Check the status of the slide lock
The operation of the saw is very different depending on whether the slide is locked or not. Always verify that the slide mechanism is set to the desired operation when approaching the machine.
COMMON SETTINGS
N/A
CONSUMABLES
The shop is responsible for maintaining the 12” blade in the saw.
Basic Operation
OPERATION CHECKLIST
1. Position the workpiece 2. Secure the workpiece 3. Make the cut 4. Stop the blade 5. Reset
OPERATION CHECKLIST
Position the workpiece
Lay the workpiece flat against the table and flat against the fence. The most stable position will be for the largest surface to be against the table instead of “standing up” against the fence. When making miter cuts it may be necessary to position the piece upright in order to achieve the desired angle, but extra care should be made to ensure that the piece remains firmly against the table and fence during the cut.
Pull the blade down towards the top of the workpiece and slide the workpiece left or right in order to match the blade to the cut line on the workpiece. Be aware of which side is the ‘waste’ side and which side is the ‘keep’ side to avoid cutting your piece too short.
Secure the workpiece
The smaller the workpiece is, the more likely the blade will pull the work into the throat of the fence. If your hand is able to hold the piece and stay outside the hand warning lines cast in the table, it is safe to simply hold it, as the weight of the workpiece and the leverage applied by your hand is sufficient to overcome the torque applied by the blade while cutting.
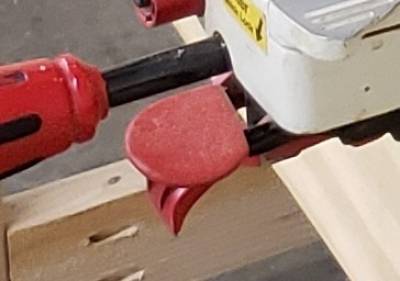
For pieces smaller than the hand warning lines, the table clamp must be utilized to hold the piece in place. Be aware that the clamp may interfere with bevel cuts, so some small cuts simply may not be possible.
If the piece is too small to be held securely by the table clamp, it is unsafe to complete this operation on the miter saw. Use a sled on the table saw to make your cut.
When using the sliding feature of this saw, the back of the blade applies a lifting force to the workpiece as it cuts, potentially lifting it from the table and creating a dangerous situation where the saw may buck unexpectedly, or the workpiece may be thrown from the saw causing injury. Always supply adequate downward force on the workpiece when making a sliding cut and use the table clamp to ensure stability.
Make the cut
When the sliding feature is locked, start with the saw in its highest position and pull the trigger. Pull the blade down to just above the workpiece. Slowly introduce the blade to the workpiece, checking to make sure the cut is properly positioned.
When the sliding feature is unlocked, pull the entire head as far forward as it will go, then pull the trigger and pull the blade down until it has bottomed out. If the blade will contact the workpiece as you plunge, adjust your speed as needed during the cut. After reaching the full depth of cut, slowly push the blade backwards through the workpiece towards the fence until the cut is complete.
Pay close attention to the sound of the motor as you cut through the workpiece. The motor should maintain its speed through the cut. If it starts to slow down, decrease the speed at which you are cutting.
The saw will have to work harder in the middle of the cut than it will at the start and end of the cut, as it is cutting a longer path through the material, so be prepared to slow down as you progress.
If the blade has a dramatic decrease in speed, release the trigger immediately. The blade is most likely being pinched, and you are at risk of kickback. Retract the blade from the cut and try to determine what might have shifted in order to cause pinching on the blade.
Stop the blade
When you have completed the cut, keep the blade at its lowest point and release the trigger. Let the blade come to a complete stop before lifting it from the cut. This prevents the spinning teeth of the blade from catching the cutoff and throwing it from the saw as the blade is lifted. It also helps prevent tearout from the teeth spinning as they pass over the newly cut faces of the workpiece.
Return the blade to its highest position
Lift the blade back to its original position, leaving room to remove your workpiece and any cutoffs, and position the next piece for processing.
Basic Operation
CLEANUP CHECKLIST
1. Brush any chips from the surfaces of the machine
2. Sweep any chips from the floor around the machine
3. Note any maintenance needs or concerns on the tag and at protohaven.org/maintenance
MAINTENANCE REQUESTS
- Update the physical Maintenance Tag at the machine
- 🟢Green can be used without issue
- 🟡Yellow can be used withcaution
- ⛔Red cannot be used without hazard to either the user or the equipment
- Record issues at http://protohaven.org/maintenance. This notifies our staff and volunteer maintenance crew of any issues.
Troubleshooting
| Common Issues | Possible Causes | Resolutions |
| ————————————————– | ——————————————————————- | ———————————————————————————————————————– |
| The blade won’t cut all the way through the work | The depth stop mechanism on the right side of the head is engaged | Flip the depth stop lever out of the way of the depth stop screw |
| The table will not swing left or right | The saw is locked into a detent The miter cam-lock is engaged | Pull the trigger at the miter table handle to release the detent Lift the cam-lock lever to disengage the cam lock |
| The rotation of the miter table is rough | Sawdust has gotten into the slides between the table and the base | Immediately report the problem in a maintenance request. This will quickly wear out the mating surfaces of the table. |
Additional Resources
N/A
Staff Use
| ⚠️ AUTHORIZED MAINTENANCE GROUP ONLY |
If you are part of the maintenance group please log on to the #maintenance channel of our Discord server to:
- Perform a Maintenance Action
- Request a Maintenance Purchase
- Review complete Maintenance Logs for each machine
- Generally chit-chat about maintenance

