Table of Contents
Weller Soldering Iron
- Model: WES51
- Manufacturer: Weller/ Apex Tool Group
- Manual: Datasheet
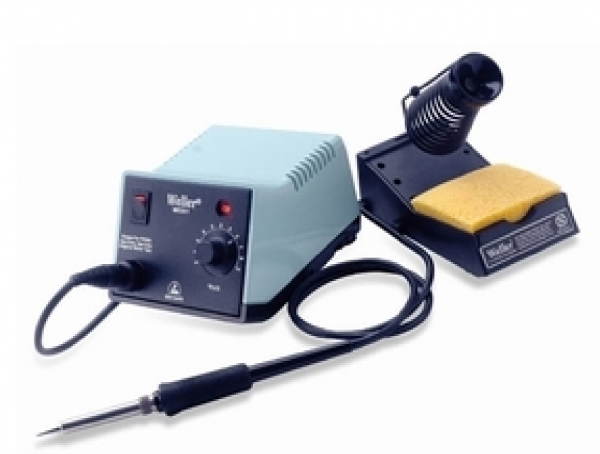
The soldering irons at Protohaven are basic analog soldering stations that are suitible for both beginners and advanced users alike. They are used to attach various components to printed circuit boards and similar to create electrical junctions between components.
The Tool Safety, Tool Care, Operation, section of this guide are what instructors use to ensure that you can use the equipment according to community expectations.
Requirements
No clearance is required to use this tool if user has prior soldering experience. If you have never soldered we suggest you take one of the electronics soldering classes to be set up for success with soldering.
Warnings
⚠️ The soldering iron operates at temperatures from 350F to 850F which poses a significant burn risk if not used properly.
⚠️ Solder may contain Lead, Always use proper ventilation or fume extraction when working with the soldering equipment. Flux vapors can also be irritating to people.
🚫Do not leave the soldering iron plugged in when not in use.
See the Safety Section for more information.
Tool Anatomy
- Soldering Station Base
- Soldering Iron Pen
- Iron Holder
For more visit the manufacturers website and user manual both linked at the top of this document.
Tool Safety
General Soldering Safety
- Never touch the element or tip of the soldering iron. They are very hot 400-800F and will burn. The solder itself also gets hot.
- Hold wires to be heated with tweezers or clamps.
- If using a cleaning sponge, keep it wet during use.
- 4. Always return the soldering iron to its stand when not in use. Never put it down on your workbench. Be sure that the stand is weighted enough or attached to your work table so that it doesn’t topple over if you brush against the cord.
- Turn the unit off or unplug it when not in use.
- Soldering irons come in models that use different wattages. Use the right size soldering iron for your projects; too much heat can ruin your board or components.
- Never, ever try to catch a hot soldering iron if you drop it. Let it fall, buy a new one if you have to — just don’t grab it!
- Give any soldered surface a minute or two to cool down before you touch it.
Work Safely with Solder, Flux, and Cleaners
- Wear eye protection. Solder can “spit” (an air pocket or impurity can pop as you heat the solder and send bits of solder flying).
- Use lead free solder.
- Keep cleaning solvents in dispensing bottle to reduce inhalation hazards.
- Always wash your hands with soap and water after soldering.
- Read and understand the MSDS (Material Safety Data Sheets) for all materials before beginning work (e.g., http://jr.chemwatch.net/chemwatch.web/account/login).
Dangers of Lead Exposure
Lead (http://www.cdc.gov/niosh/topics/lead/) on your skin can be ingested and lead fumes can be given off during soldering. Other metal (https://www.osha.gov/SLTC/metalsheavy/index.html) fumes can also be hazardous. Lead can have serious chronic health effects, such as reproductive problems, digestive problems, nerve disorders, memory and concentration problems, muscle and joint pain.
Avoid Toxic Fumes
- Work in a well‐ventilated area, to prevent the mildly caustic and toxic fumes from building up and causing eye or throat irritation.. The smoke formed is mostly from the flux which can be irritating, a sensitizer and aggravates asthma. Avoid breathing it by keeping your head to the side of, not above, your work.
- A benchtop fume extractor may be necessary to remove harmful fumes caused by solder and flux from the soldering workstation by filtering the air. If the lab is equipped with a snorkel fume extractor, always use it when soldering.
Reduce Risk From Electricity
- Always use a grounded outlet and grounding prong to reduce the risk of electrical damage if a short circuit occurs in the equipment.
- Prevent damage to electrical cords during soldering. Keep them away from heated tips.
- Never solder a live circuit (one that is energized).
Fire Prevention
- Work on a fire‐proof or nonflammable surface that is not easily ignited.
- Never place a hot soldering iron on your work surface: you could start a fire. Never leave flammable items (such as paper) near your soldering iron.
- Wear nonflammable or 100% cotton clothing that covers your arms and legs to help prevent burns.
- Know where your fire extinguisher is and how to use it.
First Aid
- Immediately cool the affected area under cold water for 15 minutes.
- Do not apply any creams or ointments. Cover with a band‐aid.
- Seek medical attention if the burn covers an area bigger than 3 inches across.
Waste
- Discard lead and silver solder and dross in a container with a lid.
- Label the container: “Lead (Silver) Solder Waste for Recycling”.
- Used solder sponges and contaminated rags must be disposed of as hazardous waste.
- Keep a lid on waste solder containers when not adding or removing material.
Tool Care
Inspection
- Ensure that the cables are in good shape and the insulation is not broken or fraying.
- Ensure your workspace is clear from debris and clutter.
- Ensure that the tip is fastened securely.
- If the tip can’t be cleaned with the sponge and won’t take on a tinning file a maintenance request to have the tip replaced.
Cleaning
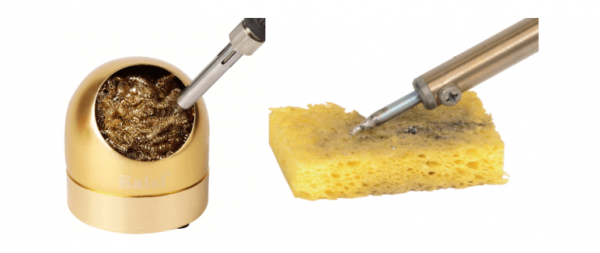
When you are done and the tip is cooling down, clean it in the copper tip cleaning sponge, it will clear of oxidation and debris and tin the tip for the next user.
Wipe down the work area with a damp cloth and dispose of all scraps.
Maintenance Requests
If you encounter any of the issues listed in the Inspection area or have any other issues with the printer not working properly
- Update the physical Maintenance Tag at the machine
- 🟢Green can be used without issue
- 🟡Yellow can be used with caution
- ⛔Red cannot be used without hazard to either the user or the equipment
- Record issues at https:%//%protohaven.org/maintenance. This notifies our staff and volunteer maintenance crew of any issues.
Recommended Soldering Procedure
- Turn on the fume extractor
- Put on safety goggles
- Make sure the iron is in the stand. Always return the soldering iron to its stand when not in use.
- Turn on the main switch to the iron (never touch the tip of the iron)
- If using a cleaning sponge, Dampen the sponge in the stand
- Wipe the tip of the iron on the cleaning sponge, either brass or natural to clean the tip.
- Melt a little solder on the tip of the iron. This 'tinning' will help the heat to flow from the iron's tip to the joint. This is necessary when you first turn on the iron and occasionally while soldering if you need to wipe the tip clean on the sponge.
- Hold the soldering iron like a pen, near the base of the handle. Imagine you are going to write your name! DO NOT touch the hot element or tip.
- Touch the soldering iron onto the joint to be made. Make sure it touches both the component lead and the track. Hold the tip there for a few seconds.
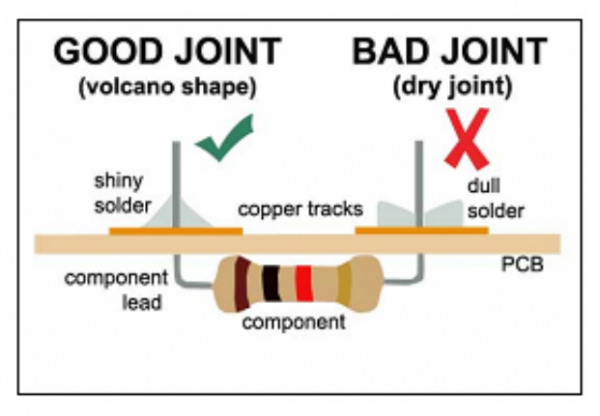
- Feed a little solder onto the joint. It should flow smoothly onto the lead and track to form a volcano shape. Apply the solder to the joint, not the iron.
- Remove the solder, then the iron, while keeping the joint still. Allow the joint a few seconds to cool before you move the circuit board.
- Remember to return the iron to the stand.
- Inspect the joint closely. It should look shiny and have a 'volcano' shape. If not, you will need to reheat it and feed in a little more solder. This time ensure that both the lead and track are heated fully before applying solder.
- Switch off and unplug the soldering station.
Tip Selection
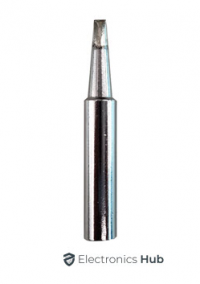
|Check out this Guide on soldering Iron tips. But unless you know you need a different style tip you should stick with the Chisel tip.
Troubleshooting
Problem 1
lipsum sorem.
Additional Resources
Staff Use
| ⚠️ AUTHORIZED MAINTENANCE GROUP ONLY |
If you are part of the maintenance group please log on to the #maintenance channel of our Discord server to:
- Perform a Maintenance Action
- Request a Maintenance Purchase
- Review complete Maintenance Logs for each machine
- Generally chit-chat about maintenance
Every Walkthrough
⚠️Ensure the soldering irons are off and unplugged when not in use. Especially when closing up for the night.
Regular Maintenance
Occasionally a tip will need to be replaced or the cleaning sponge will need to be replaced. That’s about it.


